
May 25, 2021 NHTSA CAMPAIGN NUMBER: 21V389000
Front Seat Belts Not Securely Attached To B-Pillar
An improperly attached fastener may prevent the seat belt system from performing as designed, increasing the risk of injury.
NHTSA Campaign Number: 21V389
Manufacturer Tesla , Inc.
Components SEAT BELTS
Potential Number of Units Affected 5,530
Summary
Tesla, Inc. (Tesla) is recalling certain 2018-2020 Model 3 and 2019-2021 Model Y vehicles. One or both fasteners that secure the front seat shoulder belt to the b-pillar may not be properly attached.
Remedy
Tesla Service will inspect and repair both fasteners if necessary, free of charge. Owner notification letters were mailed July 23, 2021. Owners may contact Tesla customer service online by visiting www.tesla.com/support/contact or by calling 1-877-79-TESLA (or 1-877-798-3752). Tesla’s number for this recall is SB-21-20-001.
Notes
Owners may also contact the National Highway Traffic Safety Administration Vehicle Safety Hotline at 1-888-327-4236 (TTY 1-800-424-9153), or go to www.safercar.gov.
Check if your Tesla has a Recall
Condition
On some Model 3 and Model Y vehicles, the 1st row LH and RH seatbelt D-ring to adjustable top loop bolt and/or adjustable top loop to B-pillar bolt may not have been secured to the correct specifications.
Correction
Inspect the vehicle for symptoms related to the condition. If symptoms are present, torque the fasteners to the correct specifications and, if necessary, repair the LH/RH B-pillar bolt hole thread(s), replace the LH/RH adjustable top loop(s), and/or replace the fasteners.
Procedure
- Release the LH B-pillar trim from the vehicle, and then set it aside (refer to Service Manual procedure 20051001; Model 3, Model Y).
NOTE: The B-pillar trim is still attached to the seatbelt.
- Inspect the bolt that attaches the LH 1st row seatbelt retractor D-ring to the adjustable top loop.
- If bolt threads are not visible between the retractor D-ring and adjustable top loop (Figure 1), the adjustable top loop does not require inspection; take note and skip to step 3
NOTE: Visible bolt collar (Figure 1, yellow arrow) is expected.
- If bolt threads are visible between the retractor D-ring and adjustable top loop (Figure 2, yellow arrow), the bolt and adjustable top loop bolt hole threads require inspection; take note and continue to step 3.
- Wiggle the LH adjustable top loop and inspect for a gap between the adjustable top loop and the B-pillar (Figure 3).
- If the adjustable top loop does not wiggle and is tight against the B-Pillar, the B-pillar bolt hole threads do not require inspection; take note and skip to step 4.
- If the adjustable top loop wiggles or is not flush against the B-pillar, the adjustable top loop bolt and B-pillar bolt hole threads require inspection; take note and skip to step 5.
- If steps 2 and 3 determine that no further inspection is required, torque both previously mentioned bolts (torque 20 Nm), take note, and skip to step 10. If further inspection is required, continue to step 5.
- If inspection is required, remove the bolt that attaches the LH 1st row seatbelt retractor D-ring to the adjustable top loop, and then set the retractor D-ring aside (Figure 4). If inspection is not required, skip to step 8.
- Inspect the bolt that attaches the LH 1st row seatbelt retractor D-ring to the adjustable top loop (Figure 5).
- If any of the bolt threads are damaged, discard the bolt and procure a new bolt.
- If none of the bolt threads are damaged, set the bolt aside for reuse.
- Inspect the LH 1st row seatbelt retractor D-ring to adjustable top loop bolt hole (Figure 6).
- If the bolt hole threads are damaged, the adjustable top loop requires replacement; take note and skip to step 8.
- If the bolt hole threads are undamaged, the adjustable top loop does not require replacement; take note and continue to step 8.
- If inspection is required, remove the bolt that attaches the LH adjustable top loop to the B-pillar (Figure 7) and inspect the B-Pillar bolt hole (Figure 8). If inspection is not required, skip to step 10.
- If the B-pillar bolt hole threads are damaged, repair is required; take note and skip to step 9.
- If the B-pillar bolt hole threads are not damaged, repair is not required; take note and continue to step 9.
- If the adjustable top loop is being reused, inspect the bolt that attaches the LH adjustable top loop to the B-pillar (Figure 9).
- If any of bolt threads are damaged, remove and discard the clip that attaches the bolt to the adjustable top loop, discard the bolt, and install a new bolt.
NOTE: The clip does not need reuse or replacement.
- If none of the bolt threads are damaged, take note and set the adjustable top loop aside.
- Repeat steps 1–9 for the RH 1st row seatbelt, and after returning to this step, continue to step 11.
- Repair any damaged B-pillar bolt holes as instructed in section “B-pillar Repair”.
- Replace or reinstall the adjustable top loop(s) depending on the noted condition of the adjustable top loop bolt hole threads, and then install all components that were removed for access (refer to Service Manual procedure 20051001; Model 3, Model Y).
NOTE: If upon inspection the seatbelt retractor D-ring bolt was undamaged, it can be reused.
B-Pillar Thread Repair
NOTE: Refer to TN-15-92-001 for guidelines on using the thread repair kit.
- Use the 12 mm drill bit from the thread repair kit, with cutting oil, to drill out the damaged threads (Figure 10).
WARNING: Wear safety glasses to protect from debris.
CAUTION: Do not drill through the vehicle body. Only drill out the damaged threads.
- NOTE: If necessary, start with a smaller drill bit.
- NOTE: Back out and re-insert the drill bit as needed.
- Use the Heli-Coil tap, with cutting oil, to tap new threads on the B-pillar (Figure 11). Reapply cutting oil as needed.
CAUTION: Make sure the tap remains perpendicular with the bolt hole.
CAUTION: Do not tap past the weld collar nut. Refer to Figure 12 to visualize the depth of the weld collar nut.
- NOTE: For every full rotation of the tap, back out ½ a turn to break off any metal shavings.
- NOTE: If necessary, completely back out the tap to clean off excess debris.
- From the thread repair kit, obtain a Heli-Coil insert that matches the depth of the tapped threads.
- Position a Heli-Coil insert on a threaded handle, and then install the insert in the B-pillar (Figure 13).
CAUTION: Make sure the insert is flush with the surface of the B-pillar and that tapped threads are not visible past the insert (Figure 14).
- Use the tang break-off tool and a deadblow hammer to break the Heli-Coil tang (Figure 15).
- Clean up any excess cutting oil and metal shavings in the cabin.
IMPORTANT SAFETY RECALL
NHTSA Recall Code: 21V-389
Dear Tesla Owner,
This notice is sent to you in accordance with the National Traffic and Motor Vehicle Safety Act. Tesla, Inc., has determined that a defect which relates to motor vehicle safety exists in certain Model Year 2018-2020 Model 3 vehicles and Model Year 2019-2021 Model Y vehicles. Our records show that you are the owner of a vehicle affected by this action.
REASON FOR THIS RECALL
One or both bolts that secure the front seat shoulder belt to the b-pillar may not be properly attached. An improperly attached bolt may prevent the seat belt system from performing as designed, increasing the risk of injury.
WHAT TESLA WILL DO
At no charge to you, Tesla Service will inspect the bolts and adjust them to internal specification or replace them if necessary.
WHAT YOU SHOULD DO
Please schedule a service appointment through your Tesla mobile app. Alternatively, if you wish to contact your nearest Tesla Service Center or require technical assistance, please visit www.tesla.com/findus or call 1-877-79TESLA (1-877-798-3752). For awareness, the appointment will take approximately 15 minutes to perform both the inspection and repair, if necessary.
If you believe that Tesla has failed or is unable to remedy this defect without charge or within a reasonable time, you may submit a complaint to the Administrator, National Highway Traffic Safety Administration, 1200 New Jersey Avenue SE, Washington, DC 20590, by calling 1-888-327-4236 (TTY: 1-800-424-9153), or by visiting www.safercar.gov.
Federal law requires any lessor who receives a notification of a determination of a noncompliance pertaining to any leased motor vehicle to send the notice to the lessee within 10 days.
Thank you for being a Tesla customer. We are committed to ensuring that your vehicle provides the highest possible level of safety.
TESLA, INC.
SEOCONTENT-START
SB-21-20-001 Page 1 of 7
_
Tesla, Inc.
Service Bulletin Inspect 1st Row Seatbelt Bolts
SB-21-20-001
May 27, 2021
Classification Section/Group Mobile Service
Recall Bulletin 20 – Safety and Restraint Can Perform
(where permitted)
Model Year Model Country/Region Version
2018 – 2021 Model 3, Model Y All All
The model(s) and model year(s) listed are a general approximation of the affected VIN list. Refer to the VIN/Bulletin Tracker or Customer/Vehicle profile to determine
applicability of this bulletin for a particular vehicle.
Recall Bulletin: Recall Bulletins are mandatory service procedures that must be carried out by Tesla-certified Service Centers.
Recall work performed by uncertified technicians could lead to unsafe conditions or voided warranty provisions.
Condition
On some Model 3 and Model Y vehicles, the 1st row LH and RH seatbelt D-ring to adjustable top loop bolt and/or
adjustable top loop to B-pillar bolt may not have been secured to the correct specifications.
Correction
Inspect the vehicle for symptoms related to the condition. If symptoms are present, torque the fasteners to the correct
specifications and, if necessary, repair the LH/RH B-pillar bolt hole thread(s), replace the LH/RH adjustable top
loop(s), and/or replace the fasteners.
Correction Description Correction Time
Inspect 1st Row Seatbelts, No Repairs Needed S012120001 0.10
Inspect 1st Row Seatbelts, Replace LH Adjustable Top Loop
S022120001 0.10
Inspect 1st Row Seatbelts, Replace RH Adjustable Top Loop
S032120001 0.10
Inspect 1st Row Seatbelts, Repair LH B-Pillar Threads
S042120001 0.15
Inspect 1st Row Seatbelts, Repair RH B-Pillar Threads
S052120001 0.15
Inspect 1st Row Seatbelts, Replace LH and RH Adjustable Top Loops
S062120001 0.15
Inspect 1st Row Seatbelts, Replace LH Adjustable Top Loop and Repair LH B-Pillar
Threads
S072120001 0.15
Inspect 1st Row Seatbelts, Replace RH Adjustable Top Loop and Repair RH B-Pillar
Threads
S082120001 0.15
Inspect 1st Row Seatbelts, Replace LH Adjustable Top Loop and Repair RH B-Pillar
Threads
S092120001 0.20
Inspect 1st Row Seatbelts, Replace RH Adjustable Top Loop and Repair LH B-Pillar
Threads
S102120001 0.20
Inspect 1st Row Seatbelts, Replace LH and RH Adjustable Top Loops and Repair LH
B-Pillar Threads
S112120001 0.20
Inspect 1st Row Seatbelts, Replace LH and RH Adjustable Top Loops and Repair RH
B-Pillar Threads
S122120001 0.20
Inspect 1st Row Seatbelts, Repair LH and RH B-Pillar Threads
S132120001 0.25
Inspect 1st Row Seatbelts, Replace LH Adjustable Top Loop and Repair LH and RH BPillar
Threads
S142120001 0.25
Inspect 1st Row Seatbelts, Replace RH Adjustable Top Loop and Repair LH and RH
B-Pillar Threads
S152120001 0.25
Inspect 1st Row Seatbelts, Replace LH and RH Adjustable Top Loops and Repair LH
and RH B-Pillar Threads
S162120001 0.25
SB-21-20-001 Page 2 of 7
_
Part Number Description Quantity
If Necessary
1068130-01-B
1515051-00-A
1117247-00-A
M3Y 1R SB HEIGHT ADJUSTER
SBOLT[9×13],7/16×10,[109],G0109[B],PTP
M3 – M8X1.5 25MM HA70 CAPTURED FASTENER
1–2
1–2
1–2
These part numbers were current at the time of publication. Use the revisions listed or later, unless otherwise specified in the Parts Catalog.
Special Tools
1056155-08-A
1115199-00-A
KIT, THREAD REPAIR, M8 X 1.25
HAMMER, DEAD BLOW, 48OZ
Shop Supplies
Tesla Cutting Lube
Procedure
1. Release the LH B-pillar trim from the vehicle, and then set it aside (refer to Service Manual procedure 20051001; Model 3, Model Y).
NOTE: The B-pillar trim is still attached to the seatbelt.
2. Inspect the bolt that attaches the LH 1st row seatbelt retractor D-ring to the adjustable top loop.
• If bolt threads are not visible between the retractor D-ring and adjustable top loop (Figure 1), the adjustable top loop does not require inspection; take note and skip to step 3
NOTE: Visible bolt collar (Figure 1, yellow arrow) is expected.
• If bolt threads are visible between the retractor D-ring and adjustable top loop (Figure 2, yellow arrow), the bolt and adjustable top loop bolt hole threads require inspection; take note and continue to step 3.
Figure 1 – LH shown; RH similar
Figure 2 – LH shown; RH similar
3. Wiggle the LH adjustable top loop and inspect for a gap between the adjustable top loop and the B-pillar (Figure 3).
SB-21-20-001 Page 3 of 7
_
Figure 3 – LH shown; RH similar
• If the adjustable top loop does not wiggle and is tight against the B-Pillar, the B-pillar bolt hole threads do not require inspection; take note and skip to step 4.
• If the adjustable top loop wiggles or is not flush against the B-pillar, the adjustable top loop bolt and B-pillar bolt hole threads require inspection; take note and skip to step 5.
4. If steps 2 and 3 determine that no further inspection is required, torque both previously mentioned bolts (torque 20 Nm), take note, and skip to step 10. If further inspection is required, continue to step 5.
5. If inspection is required, remove the bolt that attaches the LH 1st row seatbelt retractor D-ring to the adjustable top loop, and then set the retractor D-ring aside (Figure 4). If inspection is not required, skip to step 8.
Figure 4 – LH shown; RH similar
SB-21-20-001 Page 4 of 7
_
6. Inspect the bolt that attaches the LH 1st row seatbelt retractor D-ring to the adjustable top loop (Figure 5).
Figure 5
• If any of the bolt threads are damaged, discard the bolt and procure a new bolt.
• If none of the bolt threads are damaged, set the bolt aside for reuse.
7. Inspect the LH 1st row seatbelt retractor D-ring to adjustable top loop bolt hole (Figure 6).
Figure 6 – LH shown; RH similar
• If the bolt hole threads are damaged, the adjustable top loop requires replacement; take note and skip to step 8.
• If the bolt hole threads are undamaged, the adjustable top loop does not require replacement; take note and continue to step 8.
SB-21-20-001 Page 5 of 7
_
8. If inspection is required, remove the bolt that attaches the LH adjustable top loop to the B-pillar (Figure 7) and inspect the B-Pillar bolt hole (Figure 8). If inspection is not required, skip to step 10.
Figure 7 – LH shown; RH similar
Figure 8 – LH shown; RH similar
• If the B-pillar bolt hole threads are damaged, repair is required; take note and skip to step 9.
• If the B-pillar bolt hole threads are not damaged, repair is not required; take note and continue to step 9.
9. If the adjustable top loop is being reused, inspect the bolt that attaches the LH adjustable top loop to the B-pillar (Figure 9).
Figure 9
• If any of bolt threads are damaged, remove and discard the clip that attaches the bolt to the adjustable top loop, discard the bolt, and install a new bolt.
NOTE:The clip does not need reuse or replacement.
• If none of the bolt threads are damaged, take note and set the adjustable top loop aside.
10. Repeat steps 1–9 for the RH 1st row seatbelt, and after returning to this step, continue to step 11.
11. Repair any damaged B-pillar bolt holes as instructed in section “B-pillar Repair”.
12. Replace or reinstall the adjustable top loop(s) depending on the noted condition of the adjustable top loop bolt hole threads, and then install all components that were removed for access (refer to Service Manual procedure 20051001; Model 3, Model Y).
NOTE: If upon inspection the seatbelt retractor D-ring bolt was undamaged, it can be reused.
SB-21-20-001 Page 6 of 7
_
B-Pillar Thread Repair
NOTE: Refer to TN-15-92-001 for guidelines on using the thread repair kit.
1. Use the 12 mm drill bit from the thread repair kit, with cutting oil, to drill out the damaged threads (Figure 10).
WARNING: Wear safety glasses to protect from debris.
CAUTION: Do not drill through the vehicle body. Only drill out the damaged threads.
NOTE: If necessary, start with a smaller drill bit.
NOTE: Back out and re-insert the drill bit as needed.
Figure 10 – LH shown; RH similar
2. Use the Heli-Coil tap, with cutting oil, to tap new threads on the B-pillar (Figure 11). Reapply cutting oil as needed.
CAUTION: Make sure the tap remains perpendicular with the bolt hole.
CAUTION: Do not tap past the weld collar nut. Refer to Figure 12 to visualize the depth of the weld collar nut.
NOTE: For every full rotation of the tap, back out ½ a turn to break off any metal shavings.
NOTE: If necessary, completely back out the tap to clean off excess debris.
Figure 11 – LH shown; RH similar
Figure 12
3. From the thread repair kit, obtain a Heli-Coil insert that matches the depth of the tapped threads.
SB-21-20-001 Page 7 of 7
For feedback on the accuracy of this document, email ServiceBulletinFeedback@tesla.com
4. Position a Heli-Coil insert on a threaded handle, and then install the insert in the B-pillar (Figure 13).
CAUTION: Make sure the insert is flush with the surface of the B-pillar and that tapped threads are not visible past the insert (Figure 14).
Figure 13 – LH shown; RH similar
Figure 14
5. Use the tang break-off tool and a deadblow hammer to break the Heli-Coil tang (Figure 15).
Figure 15 – LH shown; RH similar
6. Clean up any excess cutting oil and metal shavings in the cabin.
***********************************************************************************************************
3500 Deer Creek Road
Palo Alto CA 94304
IMPORTANT SAFETY RECALL
<Date>
<Name>
<Address>
<Address 2> (if applicable; if not, remove this line)
<City, State, ZIP>
<VIN>
NHTSA Recall Code: 21V-389
Dear Tesla Owner,
This notice is sent to you in accordance with the National Traffic and Motor Vehicle Safety Act. Tesla, Inc., has
determined that a defect which relates to motor vehicle safety exists in certain Model Year 2018-2020 Model 3
vehicles and Model Year 2019-2021 Model Y vehicles. Our records show that you are the owner of a vehicle
affected by this action.
REASON FOR THIS RECALL
One or both bolts that secure the front seat shoulder belt to the b-pillar may not be properly attached. An improperly
attached bolt may prevent the seat belt system from performing as designed, increasing the risk of injury.
WHAT TESLA WILL DO
At no charge to you, Tesla Service will inspect the bolts and adjust them to internal specification or replace them if
necessary.
WHAT YOU SHOULD DO
Please schedule a service appointment through your Tesla mobile app. Alternatively, if you wish to contact your
nearest Tesla Service Center or require technical assistance, please visit www.tesla.com/findus or call 1-877-79-
TESLA (1-877-798-3752). For awareness, the appointment will take approximately 15 minutes to perform both the
inspection and repair, if necessary.
If you believe that Tesla has failed or is unable to remedy this defect without charge or within a reasonable time,
you may submit a complaint to the Administrator, National Highway Traffic Safety Administration, 1200 New Jersey
Avenue SE, Washington, DC 20590, by calling 1-888-327-4236 (TTY: 1-800-424-9153), or by visiting
www.safercar.gov.
Federal law requires any lessor who receives a notification of a determination of a noncompliance pertaining to any
leased motor vehicle to send the notice to the lessee within 10 days.
Thank you for being a Tesla customer. We are committed to ensuring that your vehicle provides the
highest possible level of safety.
TESLA, INC.
SEOCONTENT-END
6 Affected Products
Vehicles
7 Associated Documents
ISSUED Owner Notification Letter(Part 577)
RCONL-21V389-1256.pdf 18.526KB
Remedy Instructions and TSB
Recall 573 Report- Amendment 1
RCLRPT-21V389-1228.PDF 214.871KB
Defect Notice 573 Report
RCLRPT-21V389-7882.PDF 214.846KB
Recall Acknowledgement
RCAK-21V389-9519.pdf 752.803KB
Recall Quarterly Report
RCLQRT-21V389-4860.PDF 211.139KB
Recall Quarterly Report #2, 2021-4
RCLQRT-21V389-8928.PDF 211.251KB
Latest Recalls Documents
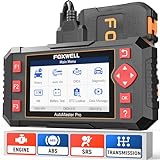
- [Easy to Use—Work Out of the Box] + [FOXWELL 2026 New Version] FOXWELL NT604 Elite scan tool is the 2026 new version from FOXWELL, designed for car owners who want to figure out the cause of issues before fixing car problems by scanning common systems like ABS, SRS, engine, and transmission. The NT604 Elite obd2 scanner diagnostic tool comes with the latest software—no need to waste time downloading software first. Plug the scanner into the OBDII port with OBDII cable to start the diagnosis.
- [Affordable] + [Reliable Car Health Monitor] Will you be confused what happens when the warning light of ABS/SRS/transmission/check engine flashes? Instead of taking your cars to dealership, this FOXWELL scanner will help you do a thorough scanning and detection for your cars and pinpoint the root cause. Note:The device is a diagnostic tool, not a repair tool. To turn off a warning light, you must first physically repair the issue causing it. Only then can the scanner be used to clear the corresponding fault code.
- [5 in 1 Car Diagnostic Scanner] Compared with obd scanners (50-100), NT604 Elite code scanner not only includes their OBDII diagnosis but also serves as ABS/SRS scanner, transmission and check engine code reader. When it’s an odb2 scanner, you can use it to check if your car is ready for annual test through I/M readiness menu. In addition, live data stream, built-in DTC library, data play back and print, all these features are a big plus for it. Note: doesn't support maintenance functions like reset or relearn. For the SRS system, NT604 Elite can read and clear common fault codes not caused by a crash, but crash/collision data cannot be cleared.
- [Fantastic AUTOVIN] + [No extra software fee] Through the AUTOVIN menu, this NT604 Elite car scanner allows you to get your V-IN and vehicle info rapidly, no need to take time to find your V-IN and input one by one. What's more, the NT604 Elite ABS SRS scanner supports 60+ car brands from worldwide (America/Asia/Europe). You don’t need to pay extra software fee. AUTOVIN may not work on some older vehicles or certain vehicle brands. If AUTOVIN fails, please input the vin code manually or go to the Diagnostic Menu to select your vehicle model.
- [Solid protective case KO plastic carrying bag] + [Lifetime update] Almost all same price-level car scanner diagnostic tool only offers plastic bag to hold the scanner.However, NT604 Elite automotive scanner is equipped with solid protective case, preventing your obd2 scanner from damage. Then you don’t need to pay extra money to buy a solid toolbox.

- 【Reset ABS/SRS/Transmission/Engine Lights】 More than an check engine code reader, OBDMATE OM901 obd2 scanner performs comprehensive diagnostics for the 4 most-used systems (ABS/SRS/Engine/Transmission). It quickly clears fault codes, turns off warning lights, read data stream and auto VIN.
- 【3.5" Handheld Scanner with 4 System Diagnose】 3.5" Super large TFT screen equipped displays an intuitive menu and clear readings of various sensors from ABS, SRS, ECM and TCM systems. It arrived with a silicone protective case and hard-shell carrying case, ensuring long-lived durability and drop resistance. The car diagnostic tool is plug-to-play designed, plug it and get diagnosis started without any batteries or updates required.
- 【One-Click I/M Readines&Full OBD2 Functions】 Press F1 to get an intuitive corloured form about whether various emissions-related systems on the vehicle are operating properly. Help you get smog-check ready quickly. OM901 car scanner supports all essential OBD2 functions you need: read & clear codes, view freeze frame, read I/M readiness, retrieve VIN, live data stream (with graphing display), O2 sensor test, onboard monitoring mode, and EVAP leak test.
- 【Battery Voltage Check&DLC Pin Test】 It allows you to monitor battery health by testing current battery voltage. Plus, this obd2 diagnostic tool features DLC 16-PIN test to check current voltage of every pin.
- 【Automotive Scanner Diagnostic Kit】 The package comes with 1 car scanner, 1 USB-type c cable, 1 hard storage bag and 1 user manual(en). Free to update without any hidden fees. 5 languanges available in setting including English, French, Italian, German and Espanish. Valuable and Portable, making it a great tool kit for car owners, DIY enthusiasts, and professional mechanics.
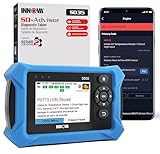
- OBD2 SCANNER FOR ALL SYSTEMS – The INNOVA SD35 is a tablet-based OBD2 scanner designed for advanced diagnostics. Read and clear check engine light, ABS, SRS, and TPMS codes, plus test your car battery and alternator to prevent unexpected failures. Vehicle coverage may vary. Please use Innova’s Coverage Checker to verify compatibility.
- ALL-SYSTEM DIAGNOSTICS & LIVE DATA – Unlike basic code readers, this OBD2 scanner for all vehicles scans engine, transmission, ABS, SRS, and more. Get real-time live data, including RPM, fuel trims, temperature readings, and oxygen sensor performance.
- OBD2 TABLET WITH USER-FRIENDLY INTERFACE – This automotive scan tool features a high-resolution display, making vehicle diagnostics faster and easier.
- ADVANCED TPMS, OIL RESET & SERVICE FUNCTIONS – Perform TPMS sensor checks, oil light reset, and other service resets with ease This professional diagnostic tool provides comprehensive vehicle maintenance capabilities in one device.
- WIDE VEHICLE COVERAGE (1996 & NEWER CARS & TRUCKS) – This OBD2 scanner Bluetooth tablet is compatible with Toyota, Ford, Honda, Chevrolet, Nissan, Dodge, and more. However, feature coverage may vary. Please use Innova's Coverage Checker to verify coverage.
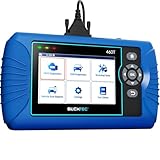
- [All System Diagnostics, Professional-Level Scanner] - BLCKTEC 460T is the ultimate OBD2 diagnostic tool for home mechanics and professionals. It supports all 10 OBD2 modes, reads and clears Engine/Transmission/ABS/SRS codes, performs All-System Diagnostics, offers workshop reset tools, and provides real-time live data. It helps you pinpoint issues, assess your car's condition, and prepare for SMOG checks with ease. NOTE: Function availability depends on your vehicle. Before you buy, be sure to use the Compatibility Checker on BLCKTEC website or contact our customer support to verify that the features you need are supported for your vehicle’s specific year, make, and model.
- [12+ Most Popular Reset Functions] - BLCKTEC 460T OBD2 scanner offers 12+ dealer-level service functions, including Oil Maintenance Reset, ABS Bleeding, EPB Reset, SAS(Steering Angle Sensor) Recalibration, DPF(Diesel Particulate Filter) Reset, Throttle Body Relearn, Battery Reset/Initialization, TPMS Relearn, Transmission Reset, Fluid Change Reset, Maintenance Reset and more, enabling you to perform workshop services like a pro. NOTE: Function availability depends on your vehicle. Be sure to use the Compatibility Checker on BLCKTEC website to verify that the features you need are supported for your vehicle.
- [Real-Time OBD2 and OEM Live Data, Freeze Frame Data] - BLCKTEC 460T helps diagnose vehicle issues when warning lights like Check Engine Light or ABS/SRS Light appear. It offers detailed DTC info, ECU Freeze Frame Data, and real-time OBD2 and advanced OEM live data, including Engine, Transmission, ABS, SRS, and more, making it easy to diagnose and resolve vehicle problems. You can view, graph, record, replay, and overlay up to four live data streams in a single graph for better analysis.
- [AutoVIN, AutoReLink, AutoScan, 3X Faster] - Equipped with AutoVIN technology, 460T automatically retrieves the VIN to save you time. Its AutoScan and AutoReLink features scan all of the vehicle's ECUs and detect any fault codes immediately after you plug the scanner into the vehicle's OBD2 port - no button presses required. Additionally, it regathers DTC and I/M readiness information every 30 seconds, simplifying monitor tests. 460T's advanced technology makes it 3X faster than other products.
- [Get RepairSolutions2, the #1 Auto Repair App for Free] - When paired with RepairSolutions2(RS2) App, 460T becomes even more powerful. RS2's Verified Fix Database built by master technicians, provides the parts needed for the repair. Additionally, RS2 gives you access to OEM warranty info, maintenance schedules, TSB, and dealership recall info, making car care easier than ever. RS2 is free with no subscription fees and it stores your car scan reports in the cloud, allowing you to access, share, or print them anytime and anywhere.

- [Brand-New ArtiDiag500] We've got everything you're looking for! Forget basic OBD2 scanners; TOPDON's ArtiDiag500 car scanner offers more. The all-new ArtiDiag500 not only includes full OBD2 functions and 4-system diagnostics but also provides DIYers with 6 maintenance services. The brand-new, cost effective AD500 is back in full swing!
- [4-System Diagnostics] DIY enthusiasts, take notice! Will these 4-system diagnostics be the treasure you've been seeking? The ArtiDiag500 code reader offers in-depth testing for the engine, transmission, ABS, and SRS systems, reading fault codes and data streams. It also visualizes real-time data in chart form, simplifying complex data for storage and future playback, aiding DIY users in problem detection.
- [6 Reset Functions] Hey, hang tight for a moment. With these 6 reset functions, the ArtiDiag500 has got you covered. It offers throttle adaptation along with reset capabilities for Oil, SAS, TPMS, BMS, and EPB. Seamlessly aligning the throttle, battery, tires, and brake pads with your vehicle, it also adjusts the steering angle and turns off the oil light. Looking to restore your car to its original condition? Look no further than the ArtiDiag500.
- [Multiple Functions] The Smart AutoVIN of this TOPDON OBD2 scanner keeps track of your manual selections for vehicle make, model, and year and directs you to the suitable diagnostics. Max 4 Live Data streams integrated for much easier data processing. Diagnostic feedback online with this diagnostic tool to help you get tough repair operations well-completed. Real-time car battery voltage monitoring identifies probable vehicle defects.
- [Wide Vehicle Coverage] ArtiDiag500 currently supports 67+ car brands, 10,000+ models, covering most vehicles worldwide. Supports cutting-edge CAN FD protocols, making it compatible with modern vehicles including 2020+ GM & Chrysler. It supports FCA AutoAuth (official Secure Gateway access) to stay up to date with newer models from Chrysler, Jeep, Fiat, and others. Plus, it's fully compatible with Android 11 for smoother use. Note: Please charge AD500 regularly to maintain battery performance and prevent power-on issues caused by prolonged periods of non-use.
This product presentation was made with AAWP plugin.